 Twas time to begin construction on the mummy! It was a nice cool night out and got the urge to really get a start on the mummy box. I had a large 4'x8' piece of Styrofoam cut down a bit at home depot and did quite a bit of measuring (and well, remeasuring) and math to figure out how best to construct this thing. That said, it's a pretty simple construction. Basically a box with a half a lid. The 'mummy' will only be a torso with arms and a head, the cover as if it was ripped out. Still deciding if I want the arms to be outstretched or crossed. Used gorilla glue on this one, and after a little patience, had a nice box that's about 5 feet tall by about 2 feet wide, with a depth of just under 10". I'm going to let it set overnight before painting it or putting on the foam. I'll probably paint it first before the foam. The foam is just to give the basic form of a torso and something to stick the arms into (or rest on, depending on which way I go). I've got gauze bandages that I'm planning on dipping in paper mache (or rather, watered down wallpaper paste) and building up some bandages. But it's definitely on it's way!
**UPDATE**

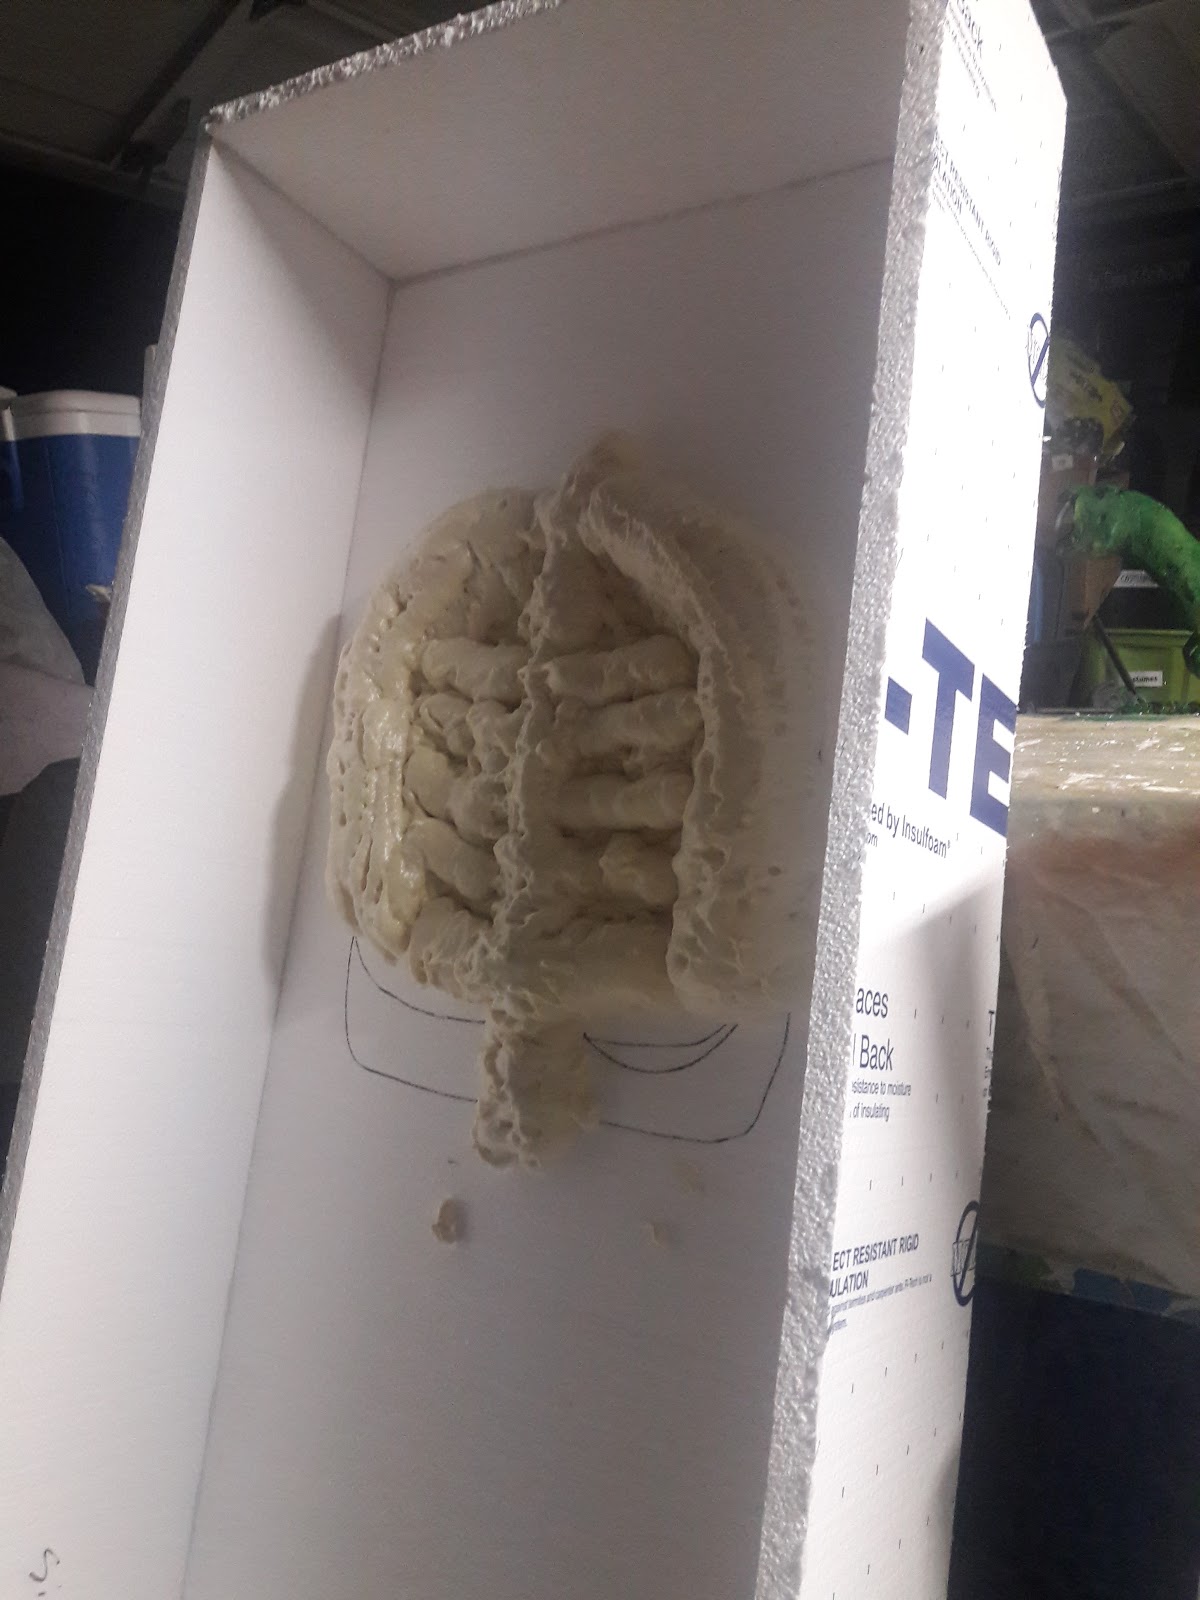 The box got fully painted with an "almond" paint. I originally was going to go with something darker like the gold background would be, but I'm liking how this color turned out. Another important step was to get the foam form onto the base. Pretty straightforward. Just building up a layer of foam, then blocking out some arms and a bit of a ribcage. I'm not sure how much that kind of form will matter once I start layering on the paper mache bandages, but I'd rather have it just in case some of it will show through. I'm considering making some deeper cuts into the foam so that they stand out a bit more--the foam tends to puff up a bit and realistically, the arms wouldn't be as bulky and the ribs would be a bit more defined.
 The next part I've been working on is the cover. After some inspection of my goal picture (which, yes, I'm modifying and am not trying to recreate completely) has a sarcophagus-shaped section on the cover. Possibly to emphasize the sarcophagus nature and to distract from the boxy nature of the creation. Either way, it looks cool. So I've been gluing a few layers of foam together. This has an added benefit as I used pink Styrofoam on the last layer, the one that I'm intending to carve some hieroglyphs on (still yet to be decided exactly which ones) and the pink stuff makes a cleaner line. I'm intending to use gold paint in the crevices and then more almond paint over as a dry brush. Next up is to carve up the front a little, maybe smooth out the shape a bit, attach the head and arms, then start paper maching the bandages on. I'm really hoping the paper mache will work with the bandages. Doesn't have to be perfect, and I'm not really intending to do many layers--just enough to get a vaguely mummy appearance and to hid the foam a little. I am considering whether I want the mummy arms outstretched out of the tomb, or just crossed over the body. I'm leaning towards outstretched at this point though. But I'll see what I can accomplish with placing them in the foam and securing them.
 **UPDATE**

 Much progress. I've glued down the head and arms as well as gotten started on the "wrapping". I'm still a little nervous about his concept. Yes, it's essentially 'paper' mache, but I'm worried the glue isn't strong enough to hold the gauze, light as it is. I think I'll just have to see how this first layer goes. I guess I can grab some spray adhesive if it comes to that. Or mod podge spray? Either way, it's starting to look cool. I tinted the watered down wallpaper paste just a bit with black food coloring. Not by much--I just wanted to get a slightly older look than fresh white bandages. I could have painted afterwards, but I don't want to risk screwing up the face and arms. And this was a simpler solution, so there we go. I also went to town carving the cover piece on the sides. I trimmed/shaped as much as I could, then went back with some spackle to fill in some of the inevitable gaps that I can later sand down a bit. This is a technique I found via the youtube and I'm reeeeally hoping it doesn't let me down. (The internet never lies...right?)
 **UPDATE**
 More progress on the mummy front. I did another layer of wrapping, and I've decided to stop there. All the foam is covered and honestly I don't want to weigh him down too much. So I've moved him out into the sun so he can fully dry. The wrapping/gauze definitely takes longer to dry. I also sanded down the spackle on the cover quite a bit and added the 'feet' piece (just two pieces of pink foam glued together). Next up is to figure out something to carve into the cover (Sarah comes tomorrow to help me with this). Then attaching the cover and carving out the broken lid piece. And then setting up the light. It's definitely getting close though.
**UPDATE**
 |
| Darker green LED light |
 |
| The LED green light |

**UPDATE**
 After a consult with Sarah and her many many egyptian books, we figured out a basic design to draw/carve into the sarcophagus cover. I sketched it out tonight, partly following Sarah's sketch and also consulting some of her glorious Book of the Dead pictures. I'm pleased with the result. Tomorrow will hopefully be a bit less rainy and cold enough to go and carve out the designs in the garage, then paint over them.
 **UPDATE**
 Carving session. Easy enough to carve through these, especially as I used the pink styrofoam and not the white (*pats past Jess on the head*) which made much cleaner lines possible. After that was a longer session of painting in the crevices. The background will be that burnt almond, so I wanted contrast as much as possible. I weighed that against the desire to put everything in gold (not as contrast-y). So the lines separating each segment got gold, the writing go black, and then the designs down at the bottom got some red, blue, and metallic green from my grandmother's old stores of paint. I want to wait for it to completely dry. In the meantime though, I cut down the top half to look a little broken, then the larger cover to copy the pattern. Then I pulled out my heat gun and sealed up the edges along the "broken" side just a bit--which will make the paint a little easier to go on.
**UPDATE**
I did a first coat of paint over the cover with that burnt almond. It definitely washed out some of the colors unfortunately--I'm considering going back over them to touch up some of the colors. But the general impression of hieroglyphs works, so It'll do. I also need to go over with a coat of polyurethane once everything is touched up.
**UPDATE**
 The final few steps. The main one was to cut out a hole in the back so I could have access to the light. The next was to adhere a clamp so I could hang the light up. I went with a kind of half c hook with a small paint stick wedge against it to give a little bit of clearance so I could move the light in and out of place. And then finally the cover stone I pulled out the gorilla glue and put some all around the edges before putting the covers stone in place. This was all last night, so this morning I did a layer of polyurethane over everything just for a bit more of a seal. He's looking pretty snazzy. Tonight I'll test out how the light works on him.
**UPDATE**

 Some fiddling with the light to be done. I added the extender which I thought would help, but honestly it just made it harder to hide the bulb. So I'll keep it for a different project. The light isn't super ideal, but I think that's due to the LED factor. The non-LED green bulb is gorgeous--it does a nice dark creepy green. The problem is that it overheats. And the bulb is going to be right next to styrofoam and there's a risk of fire. So I have to go with the LED option. But all the green LED bulbs are super light. Which is great as a feature, but it is a very different look. I might be being too picky. I think I just really like how he turned out so I want him lit perfectly. Which isn't super possible, but I'd like to try. Maybe I could use the extender again, but tape it to the backside so that the bulb isn't hitting anywhere close to the foam....or look online for a darker LED green bulb....hmmm.... At this point, I'm okay with how he looks, but I'll probably fiddle a bit. **Ooh, thought. If my spotlight on the driveway was green and partially aimed at the porch, that might counteract some of the shadows on him. Possible solution.
No comments:
Post a Comment